Blender on buttons: a profile for the Logitech MX Creative Console
Vertex, edge and face selection, the modelling tools and snapping, with Blender's own icons and keys that show what is currently switched on

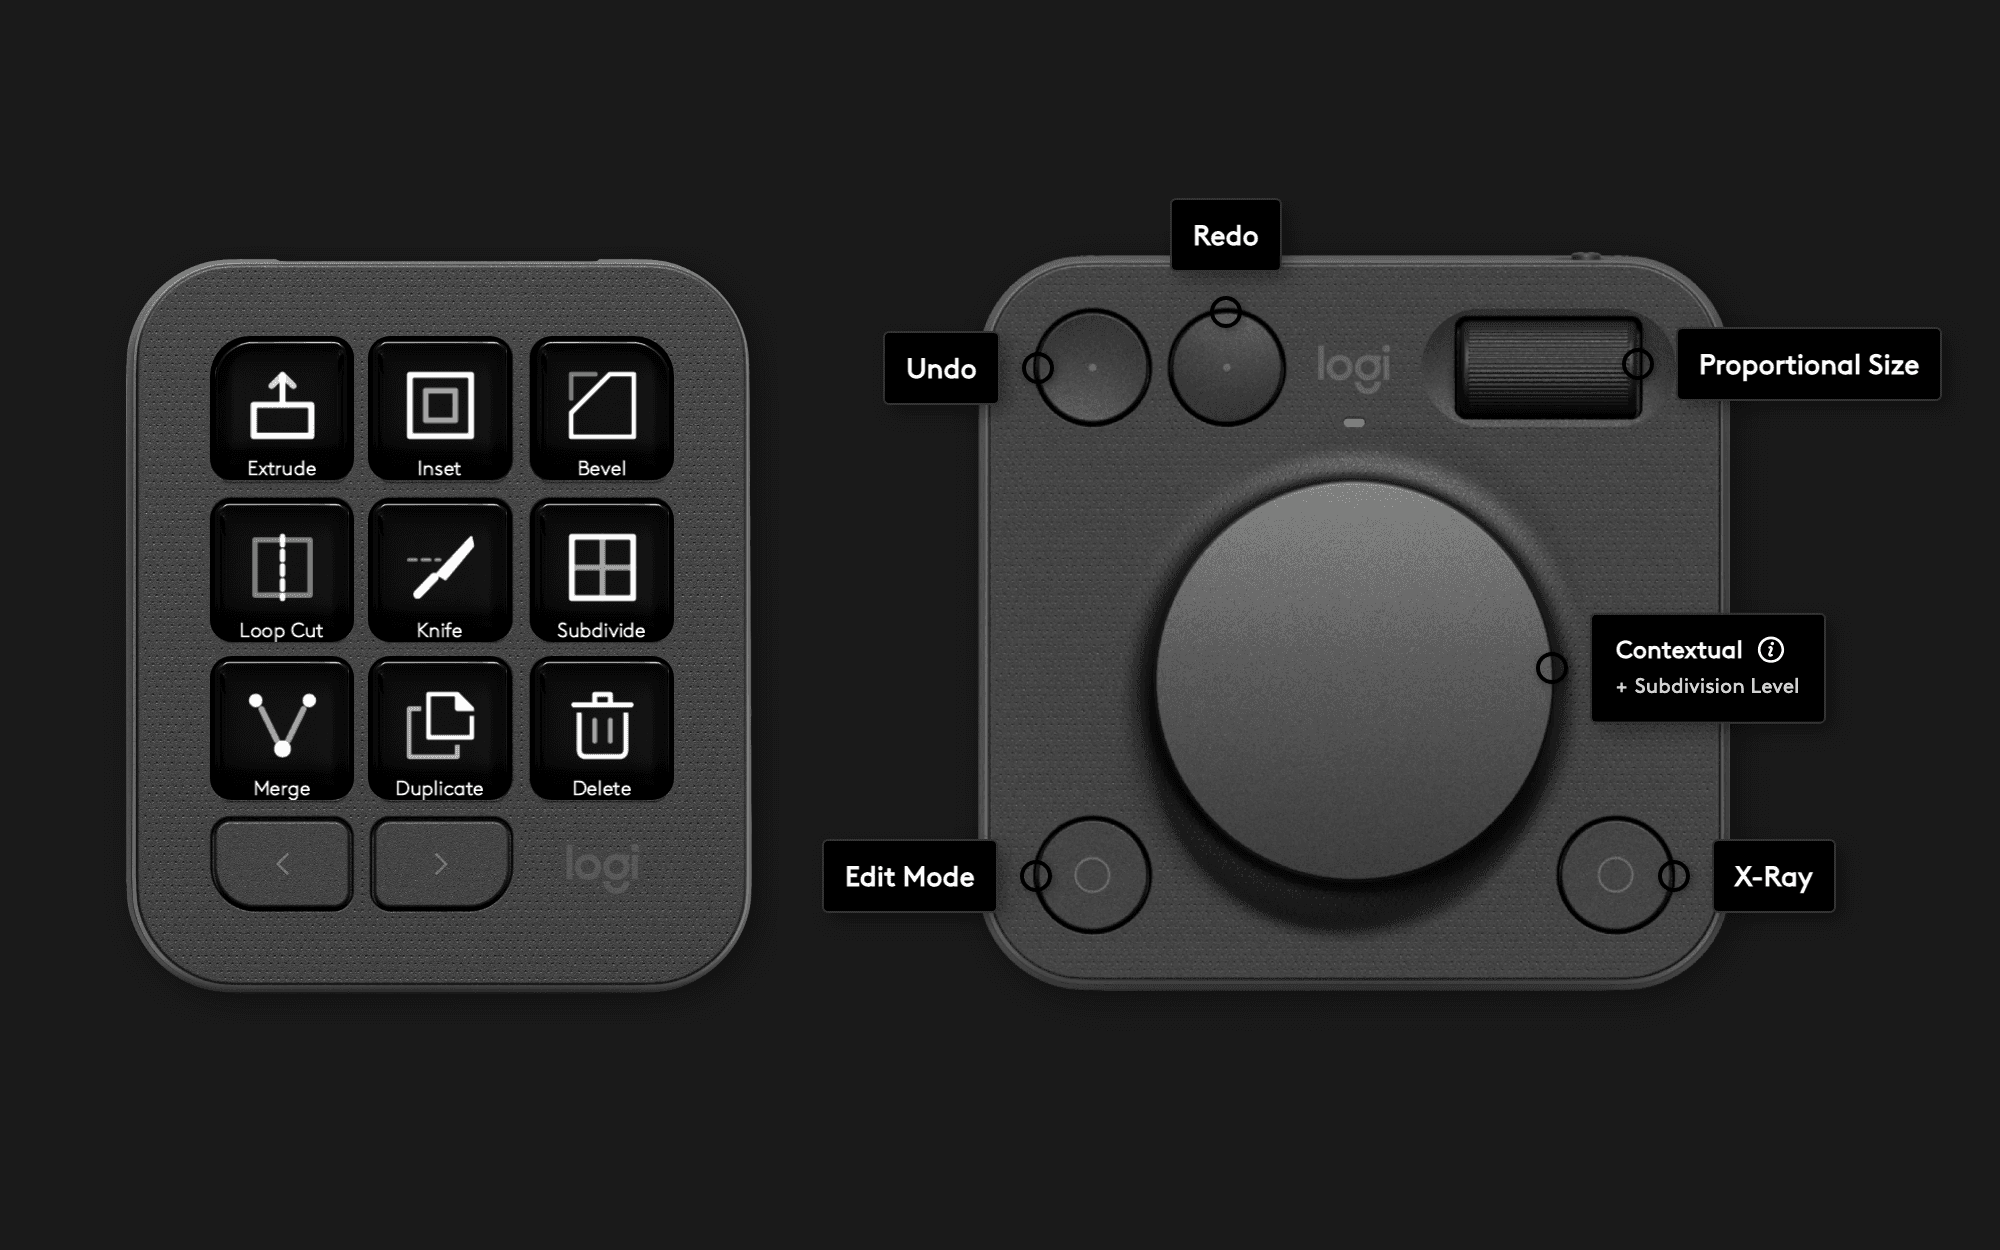
Lately I've been doing a lot of mesh editing by hand in Blender, fixing symmetry, flattening a base, closing a face where one is missing. I switch between vertices, edges and faces constantly, and I keep reaching for the same handful of tools. Meanwhile a Logitech MX Creative Console sits on my desk with no decent Blender profile for it. So I made one.
What is the MX Creative Console? A controller from Logitech for working in creative apps. It comes in two pieces: a Keypad with nine buttons, each with its own small display and icon, connected over USB-C, and a wireless Dialpad with an aluminium dial, a roller wheel and four buttons. What each key does is set per application in Logi Options+, and the keys can be spread across up to 15 pages.
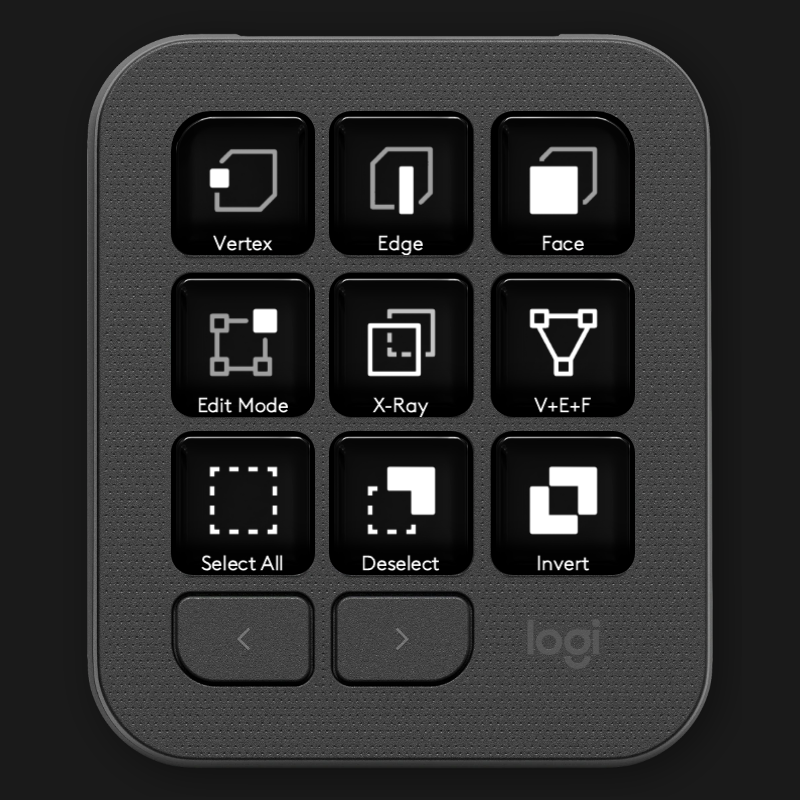
Logitech MX Creative Console
The keys show what is actually switched on in Blender
An ordinary macro just fires a keyboard shortcut. It has no idea what the application is doing. This profile talks to Blender through a small add-on, so a key lights up while its mode is active. Turn on edge selection and you can see it on the key, not only on screen. The same goes for X-Ray, snapping and proportional editing.
The icons are Blender's own, so there is nothing to decode. Ten tools have no icon to borrow, or rather Blender keeps those in an internal binary format you can't pull them out of. Extrude, inset, loop cut, knife, merge, subdivide, make face and flatten on three axes I drew myself, in the same style.
Five pages of nine keys
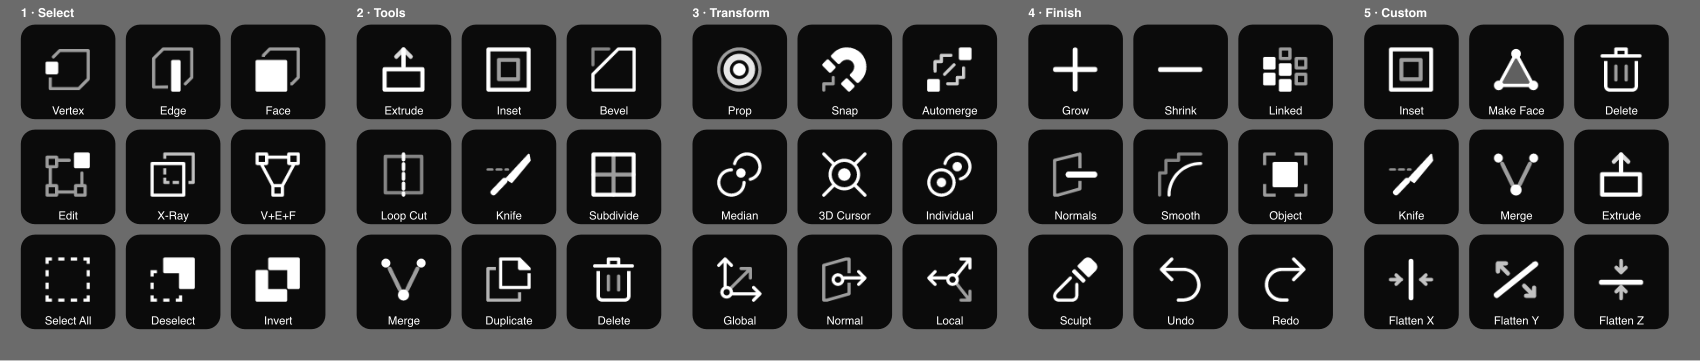
First through fifth screens with buttons
- Select – vertices, edges, faces, all three at once, edit mode, X-Ray, select all, deselect, invert
- Tools – extrude, inset, bevel, loop cut, knife, subdivide, merge, duplicate, delete
- Transform – proportional editing, snapping, auto merge, pivot point (median, 3D cursor, individual) and orientation (global, normal, local)
- Finish – grow and shrink the selection, select linked, recalculate normals, shade smooth, object mode, sculpt, undo and redo
- Custom – my own loop: inset, make face, delete, knife, merge, extrude, and flatten on the X, Y or Z axis
That last page is what I actually do most of the time. Flattening in Blender otherwise means typing S, Z, 0 - here it is one key.
The Dialpad carries undo, redo, the edit mode toggle and X-Ray. The dials change the proportional editing radius and the Subdivision Surface level.
It works without the add-on too, just less cleverly
When the add-on isn't running, the keys send an ordinary keyboard shortcut instead. You lose the state on the keys, but you keep the control. It also works on keyboard layouts where the digits sit behind Shift, a Czech layout for one, where a plain macro never reaches Blender at all.
Subdivide and the three flattens are the exception, neither has a shortcut to fall back on, so those need the add-on running.
Where to get it
I called the profile Blender MX Creative and it's free on GitHub: github.com/xfanta/blender-mx-creative. You need two files from it:
- blender_mx_bridge.zip – the Blender add-on
- Blender.lplug4 – the Logi Options+ plugin
Both links always point at the newest version.
You won't find it in the Logitech Marketplace. The profile uses Blender's icons and drives Blender through its own API, and both of those are GPL. Marketplace doesn't accept GPL, so all 39 icons would have to be redrawn first. GitHub is simpler.
What you need: a Mac, a Logitech MX Creative Console, Blender and Logi Options+. Tested with Blender 5.2, Logi Options+ 2.8 and Logi Plugin Service 6.4 on Apple silicon. No Windows yet.
Installing, in two steps
1. The add-on for Blender
- In Blender, open Edit → Preferences → Add-ons.
- Click the ▾ arrow at the top right and pick Install from Disk…
- Choose blender_mx_bridge.zip. The add-on enables itself. (Blender wants the ZIP as it is. If Safari unpacked it on download, fetch it again in another browser, or turn off Open "safe" files after downloading in Safari.)
- Click Save Preferences – without it the add-on won't be enabled next time Blender starts.
2. The plugin for Logi Options+
Installing the profile into Logi Options+ should be a double-click on the downloaded Blender.lplug4. If nothing gets installed, there is a second route through Terminal.
Open Terminal, paste in these four lines and press Enter. This assumes Blender.lplug4 is sitting in your Downloads folder.
PLUGINS=~/"Library/Application Support/Logi/LogiPluginService/Plugins"
mkdir -p "$PLUGINS/Blender"
unzip -o -q ~/Downloads/Blender.lplug4 -d "$PLUGINS/Blender"
open "loupedeck://plugin/Blender/reload"
That's it. The profile arrives with its keys already laid out, so there is nothing to drag. Switch to Blender and the console switches to its profile on its own.
If you want to rearrange the keys, they live in Logi Options+ under All Actions → Installed Plugins → Blender.
What to watch out for
The keys light up but do nothing. Restart Blender. This happened to me after the first install.
Nothing changed after updating the add-on. Blender keeps the old version in memory until it restarts. Installing the new one over it isn't enough, you have to close Blender and open it again.
The keypad is empty. The default layout is only written into a newly created profile. If you tried some Blender profile before, click the three dots next to it in Logi Options+, delete it, then add Blender again with Add profile. The new one comes with all five pages.
Give it a try and tell me
The profile grew out of my own mesh editing, so it mostly holds the tools I reach for. If a key you need is missing, or you'd lay the pages out differently, tell me in the comments or at apps@xfanta.com.

Comments
No comments yet. Be the first.